Let's Sperg Let's Sperg: Heroes of Might and Magic V - Local Tier 6 Unit Attempts to Clear Childhood Game

Throng of Titans

Superior to Black Dragons
kiwifarms.net
Joined
Feb 14, 2023
Heroes of Might and Magic is probably my top game franchise of all time, the middle three games ( 3, 4, and 5) are absolute kino and anyone who plays games should try them at least once.

One of my goals has always been to fully complete the fifth game, because despite being "casualized" in many ways, the campaign seriously squeezes your balls even on Normal and Easy difficulty, and it gets brutal surprisingly fast. I'd originally wanted to do 4, as it's my favorite, but the game is a finicky one and getting screenshots of it sucks ass, so I'll save that headache for another day.

My intention is to clear the full campaign of the base game, Hammers of Fate, and Tribes of the East, on Normal difficulty. This isn't a speedrun so I'll be sweeping the maps pretty completely unless it's not really possible to do so.

Q: I played Homm 3 or 4 but not 5, what's different?
A: If you've played 3, you'll feel at home here, there are some changes, especially to turn order in combat and the magic system, but I'll explain those as they come

Q: Why Normal?
A: Because I've gotten stuck multiple times on Normal as is, and Hard and especially Heroic difficulty are so tough that they're unfun to me. Trust me, there are plenty of challenges even on Normal and I may need to restart several times.

Q: How do I play this shit?
A: Legally? Buy it on GoG, it's also on Steam, but you need to buy the expansions separately and you're paying 30 bucks for that offsale. The entire franchise also goes on sale constantly on GoG for like 20 bucks. You could also pirate it I suppose, but I'm not providing channels for that. The game runs fine on modern systems and natively goes up to 1920x1080 resolution, while also running buttery smooth.

Any more common questions that get answered over the course of the thread will be dumped here.
The game starts with a kinda cool but kinda dated intro cutscene. I'd watch it, as it establishes some context for what's going to happen early on.

Intro.png

The main menu has a pretty Badass theme going in the background as this Archdevil and Inquisitor battle.
Screenshot_1.png

The Campaigns in V are linear and have to be completed in a specific order. The Queen is our first campaign and a pretty simple one for the most part. Missions won't take long to beat, and the only reason the first couple will take much time at all is so I can explain game mechanics.

Next time: We get started
TitleCrawl.png


(Sidenote: If my image formatting is fucked, let me know so I can fix it in the future posts)
 
Good luck. Gameplay of 5 is fine (mods add a lot of QoL stuff but break other things) but the writing, God, the writing.

Also I've never managed to like the graphics that much, cities look fine but.... it looks almost too cartoon-like. And it's a shame, because some of the concept art was done by people like Olivier LeDroit and it's magnificent, but the means of translating them in-game just weren't there.

544506_442697249085666_1462996852_n.jpg
 
I intended to get this out last night, but it seems like the database died of its own weight last night. Let's try this again.
Following. Good luck, sir.
Thanks, I'll need the luck for later!
Good luck. Gameplay of 5 is fine (mods add a lot of QoL stuff but break other things) but the writing, God, the writing.

Also I've never managed to like the graphics that much, cities look fine but.... it looks almost too cartoon-like. And it's a shame, because some of the concept art was done by people like Olivier LeDroit and it's magnificent, but the means of translating them in-game just weren't there.

544506_442697249085666_1462996852_n.jpg
Well aware of the poor writing, I'll highlight the worst of it as we go. That art is pretty badass, too bad the aesthetic they went for as far as unit models goes was best summed up as "shitty warhammer".

I will defend the town screens to the death though, they're lovely.
I have many fond childhood memories of HoMM IV and V. My favorite thing about them is the music by Paul Anthony Romero. He still regularly uploads music (and random stuff about his life) to his YouTube channel. He's incredibly talented (and also a bit of a shitposter).

Anyway, thread theme:
Solid music choice.

Yeah, One thing that's consistently excellent across the whole series is the music, even the first game has a great soundtrack, and the last few games remained excellent in terms of music.
We commence with an in-engine cutscene (2:54-8:12 in this vid, thanks, guy on youtube). Basically, Godric (old fuck) is guarding Isabel (Badass Warrior Kween!) and Beatrice (Creepy Nun that Isabel is friends with) at the Summer Palace, away from the demon invasion. As watching an impotent old man and two women sit around a palace would not exactly make for a fun campaign, things happen! Godric is sent off to try to bug the mages into allying with us against the demons, Beatrice goes to bug the elves, and Isabelle sticks around to rally some troops.
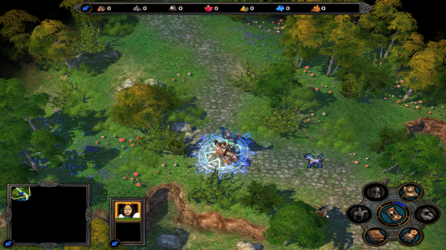
Main Screen.png
And we begin at the main Adventure Map screen. There’s a lot going on here, but not much to worry about yet. The floating blue unicorn is just the cursor, by the by. Fair warning, I will overexplain a bit in these first few parts so the future ones can focus more on the meat of things.

The bar up top is our resource bar, won’t be in play much this mission. The bottom right has the end turn button (hourglass), the blue and black notches surrounding it show the day of the week (will matter soon), the book is our spellbook, which won’t be in play this scenario, the gears are the options menu, and finally, the paper and magnifying glass are our objective screen and kingdom overview.
Screenshot_1.png
As hinted in the intro, our goal is to rally a small army, not hard given we’re under no time pressure and don’t have a proper opponent on this map. Isabel also can’t lose in battle either, but you shouldn’t be losing any fights this early.
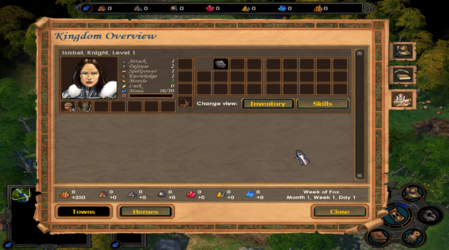
Screenshot_2.png
The third button is our kingdom overview, it’s quite bare as we control no towns or resource mines, and have only one level 1 hero with a small army. (The second button is just a transcript of the cutscene we watched at the start).
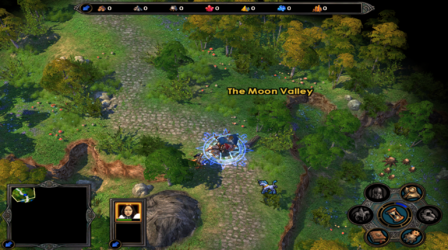
Screenshot_3.png
The green bar underneath Isabelle’s portrait at the bottom of the screen shows her movement, it drains as we travel around the map, as you may expect. The signpost here is purely for decoration, although each time I interact with it, it drains some movement (important rule).
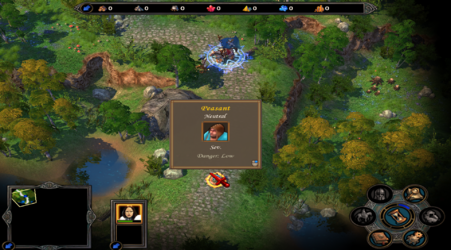
Screenshot_4.png
The path ahead is blocked by a group of neutral peasants. Neutrals aren’t under any player’s control and tend to be placed to black routes. However, in many campaign maps, especially early ones…
Screenshot_5.png
Most neutrals of your faction will offer to join you instead. This can happen naturally if you have certain skills or overwhelming force, but not nearly as much as it will in the campaign. I gladly accept the help of these unwashed men.
Screenshot_6.png
And add them to my forces.

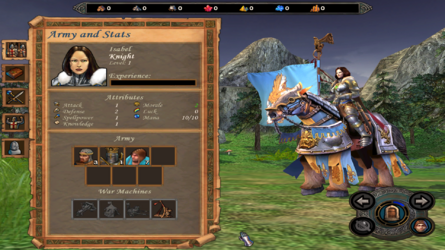
You’ll notice Isabelle has a list of stats, she doesn’t gain from them personally, but instead adds them to her units’ stats.

Attack: Attack, as you may expect, boosts the damage her units do. I believe every point of attack you have over an opponent’s defense increases the unit’s damage by 5% (ergo, if a unit has 10 more attack than the defender has defense, they deal 1.5x damage), but it’s been a while.

Defense: Opposite of attack, reduces damage a unit takes, and I believe the same 5% rule applies, but in reverse if defense is higher.

Spellpower and Knowledge are related to casting spells, which Isabelle won’t be doing until the 4th map, so I’ll skip them for now.

Morale grants a unit a chance to act again sooner in combat, I’ll show it off when we get into our first fight.

Luck grants a unit a chance to do max damage, then double it, in combat, I’ll also show that off when I get a chance.

Mana is consumed when casting spells, its value is based on Knowledge (1 knowledge=10 mana).

Our army is shown below with amounts of each troop type, and below that are our war machines, they don’t count as units, but each give additional benefits in combat. The only one we have for now is the catapult (yes, I know it’s a trebuchet, but the game calls it a catapult), which is only active when sieging down towns.
Screenshot_7.png
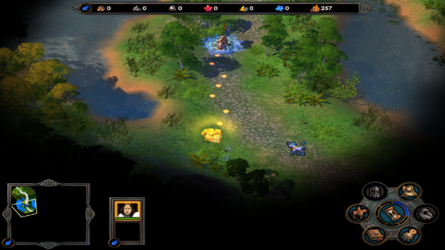
South of the neutral peasants is our first pile of resources, gold in this case. It’s important to get these, because they don’t regenerate and are needed to buy troops and build buildings.
Screenshot_8.png
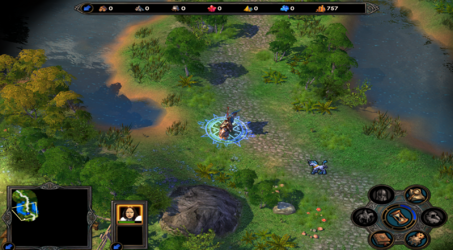
After picking up the gold, it’s added to our stockpile.
Screenshot_9.png
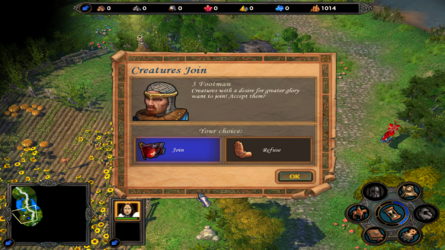
Riding south, we run into a creature dwelling (that is, the peasant hut), guarded by some footmen.
Screenshot_10.png
Being the first map though, it’s obvious they aren’t going to fight us.
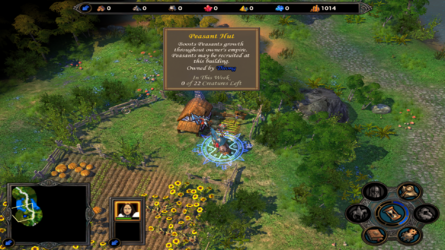
Screenshot_11.png
The peasants, being shitty tier 1 units (out of 7), join us for free, and we “flag” the dwelling. Now peasants will start accumulating here, at a rate of 22 per week. We can grab them by just running a hero to the dwelling, easy stuff.
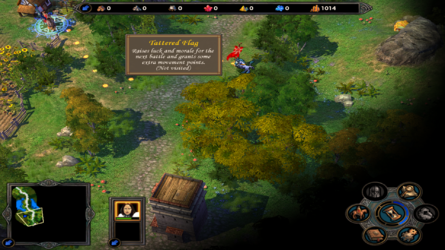
Screenshot_12.png
Before we visit the footman dwelling you can see at the bottom of the screen, I’m going to stop at this rally flag. This is one of many map objects that affects your movement and your battle stats (in this case, we get better luck and morale in our next fight, and some extra movement). I grab the gold pile to the east and then head on down.
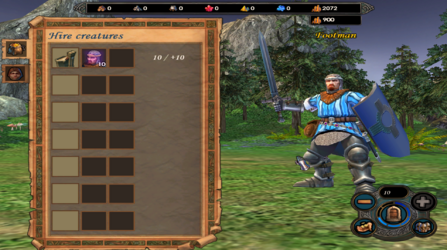
Screenshot_13.png
Footmen, due to their improved stats and hygiene, won’t join us for free, and instead we have to pay for them at a rate of 90 gold a footman. Not a bad deal, so I buy them.
Screenshot_15.png
South of the footman dwelling, off the path to the west is some wood, it won’t serve any purpose on this map (wood is used to build stuff in towns), but my inner sperg tells me to grab it anyway.
Screenshot_16.png
Another group of peasants blocks the road ahead. The game doesn’t give exact numbers of enemies, but the group term under the name tells you how many there are. In this case, a pack means there are 10-19 of them, and the game gives us a threat assessment of very low (which is accurate).

As it turns out, these peasants aren’t interested in our shit. (Cutscene runs from 8:15-8:56) In our first bit of Isabelle’s lovely characterization, she attacks her own citizens for daring to not want to march into battle with their pitchforks and blue shirts, against corpse eating demons.
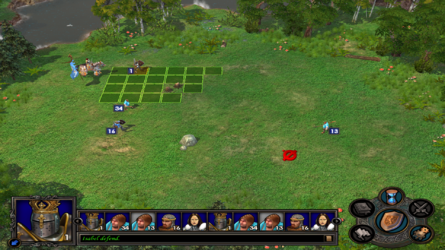
Screenshot_17.png
Our first battle commences! At the bottom of the screen, you can see the battle queue, it tells you what units (or heroes, or war machines) act when. In this case, our squires have the first action. During a unit’s turn, it can move (to any of the green squares highlighted on screen), defend (the shield), which raises its defense skill until its next turn, or wait (the hourglass, this pushes back the unit’s next turn a bit, not as much as defending or moving though).

In this battle, we have greater numbers and stronger units, so there’s no need to rush in, as the AI has no choice but to move forward.
Screenshot_18.png
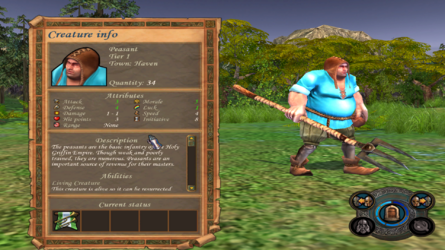
This may also be a good time to show a unit stat page for comparison. Attack and Defense have been explained already, as have luck and morale. They are highlighted in green because of boosts from either the hero, artifacts, or map pickups. As for the rest.

Damage is the amount of damage that can be dealt by a single unit of the stack per attack. In this case, this stack of peasants will deal a base of 34 damage (1 damage per peasant with 34 peasants), before accounting for attack or defense.

Hit points are the amount of damage one unit in the stack can take before it dies. If these peasants took 3 damage, for example, 1 peasant in the stack would die, reducing it to 33.

Range is a stat that exclusively affects shooters, which we don’t get in this scenario.

Speed is how far the unit can move per turn, in number of squares. Peasants are kinda slow and can move 4.

Initiative (new to Homm 3 players but actually a carryover from 4) affects how often and how soon a unit acts. Units with high initiative get to act sooner and more often than units with lower initiative.
Screenshot_19.png
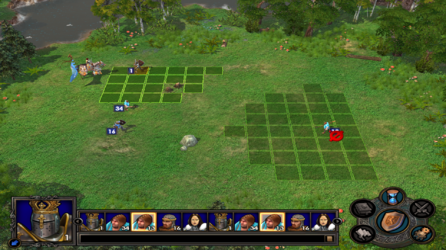
As stated, peasants are slowpokes, so I’m going to track the advance of the neutral peasants as they approach my forces.
Screenshot_20.png
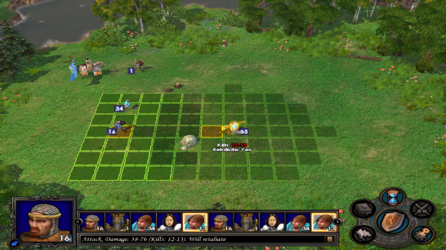
And now they close in! Mousing over a unit in melee range will allow you to preview your attack, giving you a range of possible units killed, and whether they will retaliate or not. Melee works by the attacker striking first and inflicting their kills, followed by the defender swinging back. Getting that first hit in at the right time is essential to troop preservation. In this case, footmen are tanky and peasants are wimps, so even if we low roll on damage and that 1 lives, he’ll tickle the footman and die next turn anyway.
Screenshot_21.png
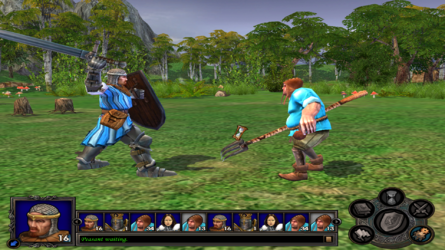
The footmen strike! (The Cinematic camera tickles my lizard brain and I’ll be throwing in screenshots when able).
Screenshot_22.png
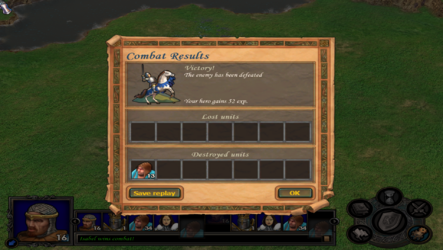
We successfully strike down the peasants, ending the battle in a victory. Isabel also gains a small amount of experience points for the win too.
Screenshot_23.png
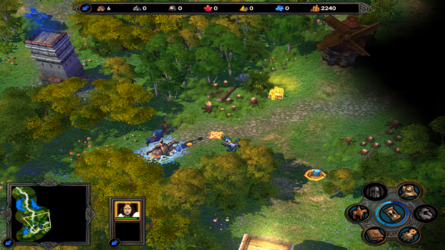
The road ahead is now clear, I pick up the peasants on the lower part of the screen (joiners), and then visit the footman tower you can just see down there, recruiting them brings their stack up to 26, completing one of our objectives.
Screenshot_24.png
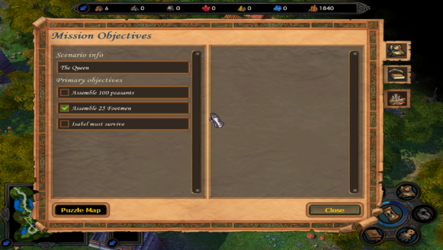
Completed objectives grant a bit of experience too, not enough to level Isabel up yet though.
Screenshot_25.png
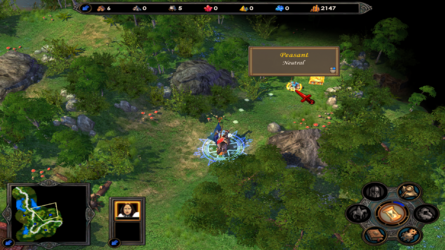
Two big things in this screenshot, firstly, we reach a new week, meaning that all of our dwellings gain a fresh batch of creatures to recruit. We don’t need to go back for any though. Secondly, you can see the windmill up top. These can be visited weekly to get a small stash of a randomly chosen resource.
Screenshot_26.png
I visit the windmill and head north instead of following the road, to gain some extra levels.
Screenshot_27.png
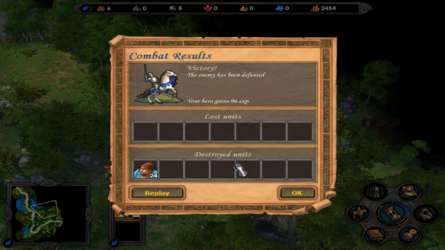
The stack of peasants aren’t joiners, but they aren’t a scripted fight, so the game can use its autocombat on them. In this case, the fight is very easy and we take no losses, so I just go with the autocombat result.
Screenshot_28.png
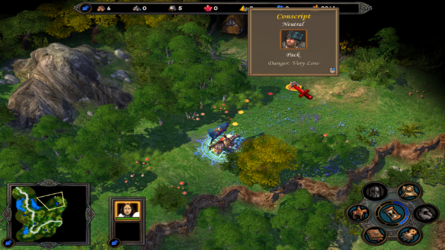
Past them are some conscripts, upgraded peasants, they aren’t so friendly.
Screenshot_29.png
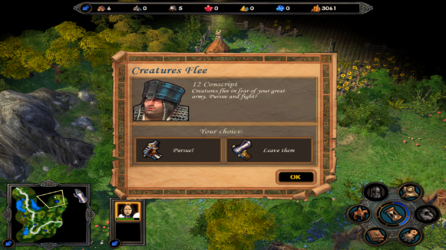
But they are smart enough to run off. When you have a huge advantage over neutrals, they may try to flee. Pursuing them fights them and grants you standard experience, letting them flee skips the fight but only gives half as much experience. I take the fight and autocombat grants an easy win. I then recruit the peasants from the dwelling they guarded.
Screenshot_30.png
Down the path is some gold guarded by a pack of plague zombies. These “Ethan Ralph after shaving” looking guys are pretty easy pickings.
Screenshot_31.png
Which doesn’t stop autocombat from losing men to them. I choose to replay the fight manually.
Screenshot_32.png
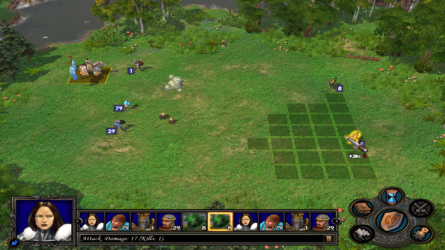
In every fight after this point, we get access to the tactics phase. This allows us to arrange our units as we please before the fight starts. I stick with the default in this case.
Screenshot_33.png
Isabel gets a turn, which shows what a hero can do on their turn. She’s not a unit (sorry Homm 4 fans), but she has the choice to do an attack to damage enemies…
Screenshot_34.png
Or to cast a spell, which she doesn’t know any of yet.
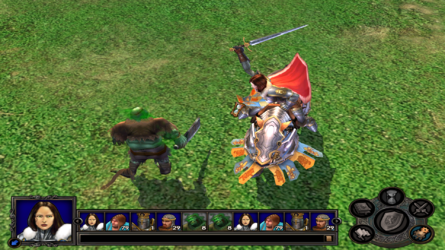
Screenshot_35.png
My strategy here is gonna be pretty simple, use Isabel to whittle down the zombies as they slowly advance across the field, then finish them when they get close.
Screenshot_36.png
It takes them three full turns to reach my men, plenty of time to cut them down a bit.
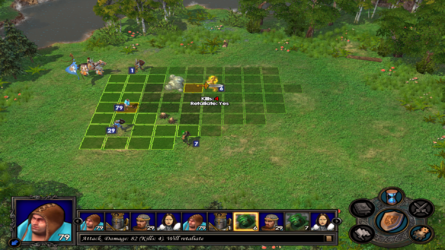
Screenshot_37.png
Finally, they reach our lines. I could strike with the peasants now, but they’d eat retaliation, and being very fragile, would surely suffer some losses.
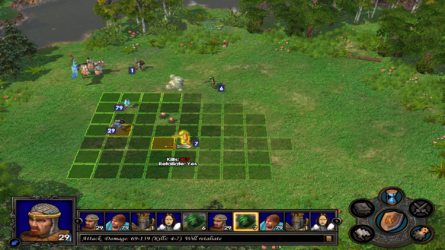
Screenshot_38.png
Instead, I wait with the peasants and let the much tankier footmen cut down the lower stack of zombies.
Screenshot_39.png
Which pays off, as you can see in the battle log. The weakening effect is a unique ability of Plague zombies, it reduces damage dealt by the unit. Not much of a concern here though.
Screenshot_40.png
The red color on the footmen means they are debuffed (from the weakness). I use the peasants to finish off the lower stack of zombies.
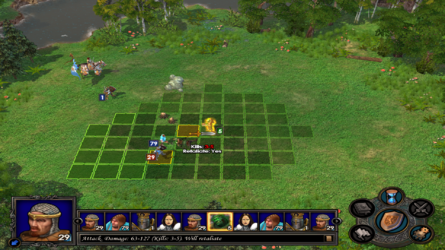
Screenshot_41.png
The green on the number of zombies is the enrage buff they get when a friendly stack dies. They try to chase down my peasants…
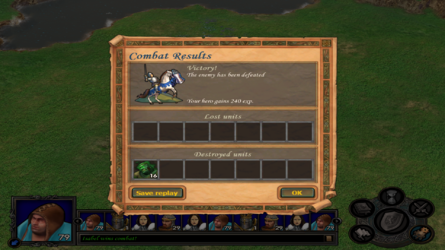
Screenshot_42.png
But my footmen finish them off before they can.
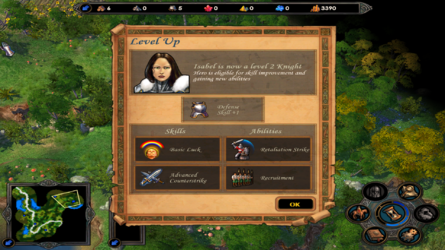
Screenshot_43.png
And we get our first level up! Levels grant one stat point in one of the four primary stats (Attack/Defense/Spellpower/Knowledge), chance to get each is weighted based on class. Isabel, being a knight, is most likely to get points in defense, followed by attack, knowledge, then spellpower.

It also grants you a chance to gain or upgrade a skill, or gain an ability (you get two skills and two abilities to choose from per level, they are selected randomly and weighted based on class). This system gets rather complex, although the big note is that each hero only has slots for 6 skills, two of which are filled at the start (one is the hero’s class unique skill, the other is their starting skill), leaving us 4 flex picks. Abilities are attached to skills and add extra bonuses.

Early on, we’ll be going mainly for skills that are desirable, to start forming our build. Isabel’s build isn’t too important, but later on, builds can make or break a hero.
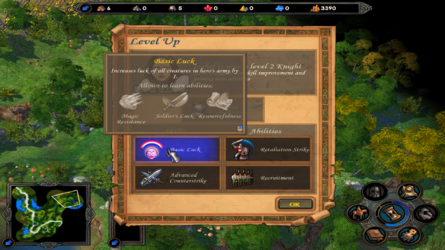
Screenshot_44.png
Of all the choices here, Basic Luck is the priority to grab. It grants 1 luck to all of our units, and allows us to learn the listed skills later. The other stuff offered is all tied to Isabel’s innate class ability, Counterstrike, and none of it is IMMEDIATELY important, so I’ll save it for later levels.
Screenshot_45.png
After leveling up, we proceed down the path, and run into a stack of footmen.
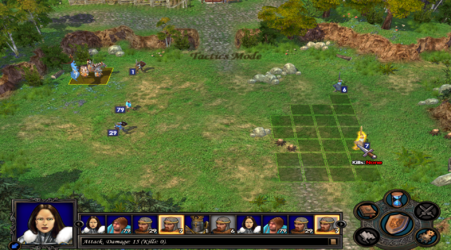
Screenshot_46.png
I choose to battle them, it’s very similar to the zombie fight, although footmen are stronger than zombies and take a bit more pressure to take down.
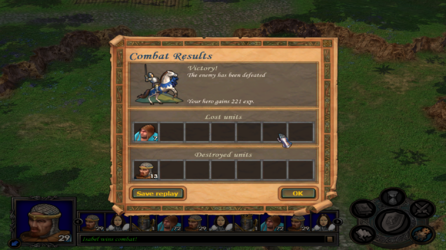
Screenshot_47.png
I still manage to down them with minimal causalities. (I’ll probably accelerate or even skip most neutral fights like this in the future, I’ll only go play by play for major battles).
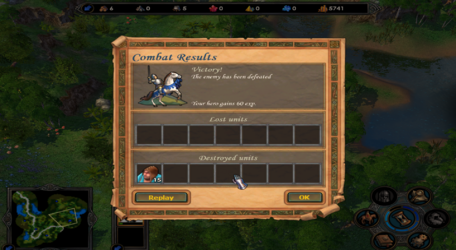
Screenshot_48.png
After defeating the footmen, we continue south and smash a weak stack of peasants.
Screenshot_49.png
And we are back on the path. I visit the faerie ring for the bonus luck.
Screenshot_50.png
And after flagging a peasant hut to the south (“guarded” by joiner peasants), we complete the 100 peasant objective. But the mission isn’t over yet, as a new objective is added.
Screenshot_51.png
The garrison is pretty well guarded given our limited forces in this scenario, but I’m not concerned, as Isabel’s stats will make the difference in the battle.
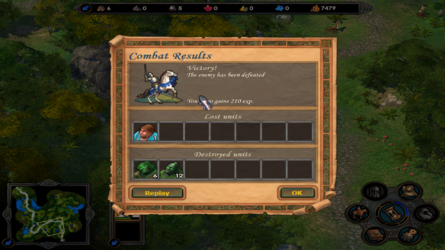
Screenshot_52.png
Before we fight the garrison, I clear out a stack of zombies, as you can see, some plague zombies (upgraded zombies) are mixed in with the stack as well.
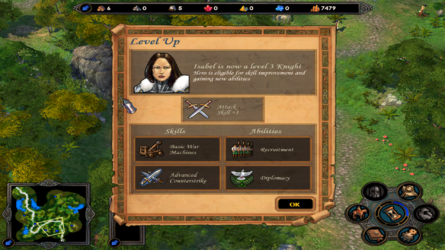
Screenshot_53.png
Isabel levels up again… and this one is kinda shit. War Machines (Lets us control the ballista and catapult and buffs them) is pretty bad, counterstrike (basically a general buff to our class specific abilities, and makes our troops hit a bit harder on retaliations) is okay but not a major priority, recruitment (boosts growth of some midlevel creatures if the hero is in town at the end of a week) is meh, and diplomacy (grants neutrals a higher chance to join us) is really chancy. I stick with Diplomacy though.
Screenshot_54.png
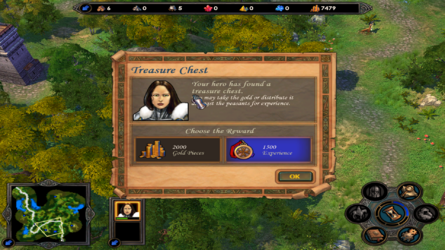
The zombies were guarding a treasure chest, these grant a randomized amount of gold or exp (from 1000-2000 gold or 500-1500 exp), you choose which one you take. As we don’t need the cash here, I take the exp.
Screenshot_55.png
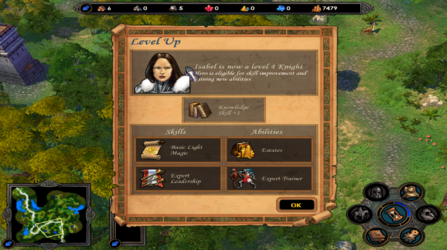
Which nudges Isabel up to 4th level. Light Magic is excellent (even though we can’t use it yet), so I take it. We’ll have plenty of chances to level up leadership (boosts morale) later, and Estates (+250 gold per turn) and Expert trainer (Will explain when relevant) aren’t really crucial right now.
Screenshot_56.png
As we near the garrison, we get one last group of reinforcements, some more squires (upgraded footmen)
Screenshot_57.png
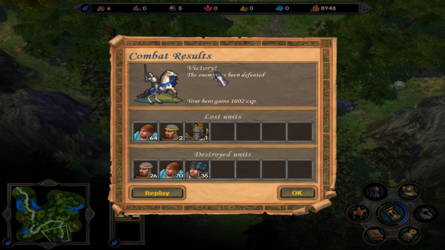
We win on autocombat… I could end it here as this is the final fight of the scenario, but I’m no pussy and want to show off a proper battle.
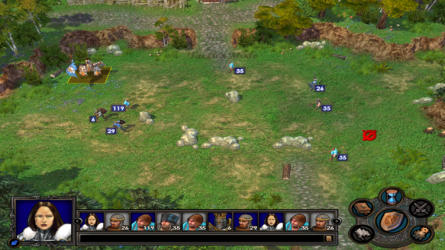
Screenshot_58.png
This is a bit tougher than what we’ve faced up to this point, our numbers are pretty close to even, so it’s going to come down to tactics and Isabel’s stat buffs and attacks to turn the tide. I let them come at me, so we can get the first strikes in.
Screenshot_59.png
I bait in their conscript stack and hit it with my footmen, the footmen are tanky enough to take only one loss.
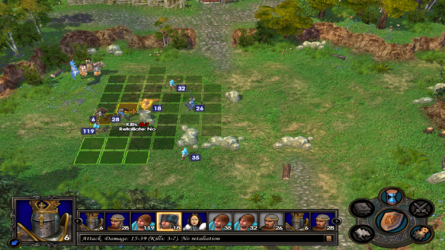
Screenshot_60.png
Most units can only retaliate once per round, so the squires can strike the conscripts without fear of taking heat.
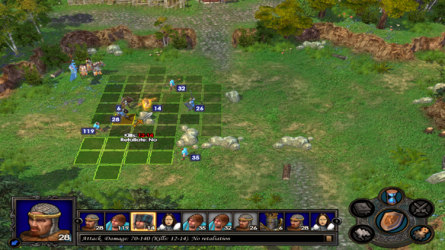
Screenshot_61.png
Finally, the footmen can act again, and finish off the conscripts.
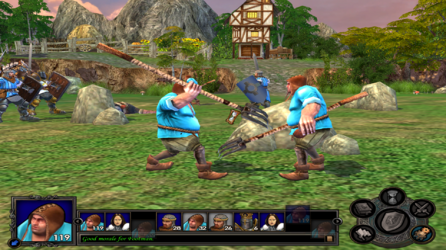
Screenshot_62.png
I run my peasants down low to finish off the stack of 35 down there.
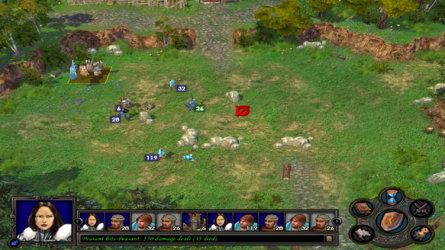
Screenshot_63.png
We’re in a good spot now, they’re down to 32 peasants and their stack of Footmen, who are now enraged and hit a bit harder.
Screenshot_64.png
Isabel cuts down the peasants and the footmen finish what’s left. Their own footmen start hitting my peasants… and get a lucky morale which gets them far away from the rest of my army.
Screenshot_65.png
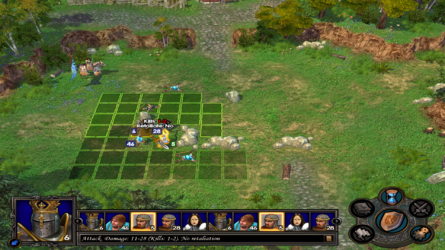
My peasants get chewed up pretty badly before the footmen and squires can roll in and rescue them, thankfully this is the last battle, so these losses are inconsequential.
Screenshot_66.png
3 stacks plus hero buffs against 1 neutral stack means the fight is basically over, we gang up on them and beat them down.
Screenshot_67.png
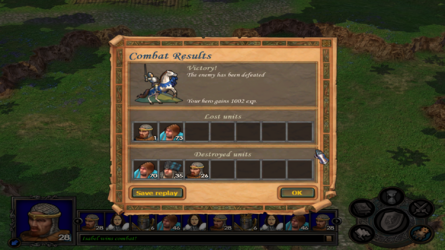
And we win! We lose more peasants than autocombat did, but without losing a squire and a footman comparatively.
Screenshot_68.png
Winning the battle and completing the last objective gives us enough exp to level to 5, the cap for this scenario. Neither of the skills are worth it right now (summoning magic is based heavily on spellpower, which knights are weak in, making it a bad choice, and it’s not necessary to put points into light magic yet). Retaliation strike is weak by itself but is needed to unlock some other abilities, while soldier’s luck is really strong (basically, any randomly occurring bonus effects on attacks will always proc for us). So I go for Soldier’s luck.
Screenshot_69.png

And we win! This is what Isabelle’s stats are looking like at the end of the scenario. We close out with yet another cutscene (09:00-09:21), looks like Isabel's got some more work ahead of her, surely she won't exhibit more violent, sociopathic tendencies towards her subjects.
Next time!
Screenshot_70.png

Audience participation!

Every scenario from here on out offers a choice of 3 starting bonuses. Sometimes these are fairly inconsequential, and some can decide the entire scenario. I’ll leave the choice of which one to pick up to people who vote in their posts… but I will give commentary. I do get to break ties though.

In this case, I lean towards the footmen, then the gold, then the peasants. The footmen are tanky and will probably have the strongest impact early on. The gold helps us get our town started, and the peasants, while they do give us gold (at a rate of 1 peasant per turn), are really fragile and preserving them will be something of a liability.

So, vote for Gold, Footmen, or Peasants!
Note: Future updates are not going to be this dense in terms of pedantic shit, like logging every neutral fight or dwelling flagged, this is mostly to give you an idea of terms and things to expect later. Future updates will focus more on highlights or big events, and may span multiple parts as the missions get longer.
 

Attachments

  • Screenshot_45.png
    Screenshot_45.png
    5.4 MB · Views: 22
  • Screenshot_69.png
    Screenshot_69.png
    3.5 MB · Views: 15
I was always played HoMaM2 but changed to HoMam3. The new ones in 3d seems to add more crap. That is my reivew. Someone I know from way back said Homam6 was great but he lost the custody of the kids. Just plan your shit in old HoMam.
 
  • Winner
Reactions: Gutter Twin
I was always played HoMaM2 but changed to HoMam3. The new ones in 3d seems to add more crap. That is my reivew. Someone I know from way back said Homam6 was great but he lost the custody of the kids. Just plan your shit in old HoMam.
6 and 7 are pretty miserable, but 5 is solid, especially if you get Tribes of the East, which fixes most of the issues the base game has.

Also, to all, planning to give a full 24 hours from the posting of the update to vote on bonuses. Afterwards, I'll move on to the next update.
 
Double-post warning:

I'll be proceeding with the next update soonish, I'm going with the Footmen due to lack of votes.
 
Took longer than expected, but got the next update finished. Hopefully the next one is a bit quicker.

We open with a quick cutscene (9:25-9:38). Surely Isabel plants to peacefully persuade the people to help her… right?
Screenshot_1.png
So much for that. We also have a week time limit, which is plenty if we head straight there.
Screenshot_2.png
We don’t carry over our army from last time (you can also see the footmen starting bonus in effect, we have 20 instead of the 10 we would have), but we do get a new unit.
Screenshot_3.png
Archers are shooters, meaning they can attack enemies at range, without risking retaliation (apart from one unit, which we will encounter later on). The “Half” range indicator shows up to what distance the archer’s shots deal full damage before dropoff is in effect, I’ll demonstrate it in battle momentarily.
Screenshot_4.png
Before that, here’s a show of the skill screen, which also shows Isabel’s unique skill, Suzerain. It’s nifty given how many of these first campaign scenarios start you without a town or with only a single town.
Screenshot_5.png
We proceed onwards, I flag the archer dwelling and recruit the 12 within before heading north to engage the skeletons who block our path.
Screenshot_6.png
And… fuck, RNG fucks us for the first time in a thankfully only slightly annoying way. Those helmeted ones are skeleton archers, upgraded skeletons. Unlike wimpass plague zombies, this is an issue, because they can shoot, meaning we’re much more likely to lose men in this fight. They aren’t certain to appear in this fight, but they can.
Screenshot_7.png
The refight starts, and you can see how ranged units are able to attack from the distance. When the arrow is broken, it means the unit is doing reduced damage, because either the target is too far away, behind an obstacle, or both. I shoot anyway, because the skeleton archers are unlikely to move up. This paid off, as the skeles failed to do enough damage to kill even one peasant.
Screenshot_8.png
I missed the screencap of it directly, but the archers also get our first luck roll. Yes, all it did was massively overkill some skeletons, but they are quite nifty.
Screenshot_9.png
The full arrow means the shot will do full damage, which easily dispatches these skeletons.
Screenshot_10.png
The skeletons were guarding an artifact. These are items you can equip that provide bonus effects, from extra resources every turn, to stat boosts, to more outlandish effects. The Four Leaf Clover is pretty simple though, just buffs our stats.
Screenshot_11.png
It’s equipped as soon as we pick it up. We have several slots for artifacts, but only one artifact can be in each slot at a time.
Screenshot_12.png
Up ahead is a redwood observatory. These are pretty nice, as they reveal large segments of the map when used.
Screenshot_13.png
This one is scripted to reveal the area around Strongbow for us, mainly to nudge you in the right direction before the time limit eats you.
Screenshot_14.png
I recruit peasants from the hut north of the observatory and ride to Strongbow.
Screenshot_15.png
Autocombat gives us no losses, and I take it. As the town (famous for its archers but not guarded by any) has no walls, it would be identical to any field battle, so I don’t think it’s worth replaying to show off.
Screenshot_16.png
And we now own a town! Strongbow’s development will be very limited, but it’s a good basic show of how towns work in V. None of the features in the bottom left panel are available in this scenario. The board with the hammer on the right side lets us build things, and the paper and the quill pen are the town’s lore.
Screenshot_17.png
Opening up the build screen reveals this panel. Buildings in color have been built, buildings in green have not been built, but we can afford to build them. Town level is how many times we’ve built a building in this town, we need to level it up to get access to the next tier of buildings (in this case, we need town level 3 to get access to the next tier of stuff).
Screenshot_18.png
Our first build is some peasant huts. These let us recruit peasants in town. It’s also cheap, the box beneath our main resource bar up top shows the cost, a mere 500 gold. I build it.
Screenshot_19.png
And then recruit the peasants within. As mentioned in Update 1, every dwelling you flag on the map increases growth of that unit in your towns by 1, so the base rate of growth is 22, and the peasant hut we flagged on the map sets it to 23. These peasants will increase by 23 weekly, and remain stocked here until we buy them.
Screenshot_20.png
A turn passes (Isabel had no movement to leave town), which allows us to build again (you can only build once per town per turn), so I build the only other option, a blacksmith (lets us buy war machines, which I don’t do here due to a minor cash shortage). This bumps our town level to 3, allowing us to start building the next tier of buildings next turn.
Screenshot_21.png
As we’ll need more than just gold to build the archer dwelling in Strongbow, I send Isabel out to claim an ore mine to the south. Ore and Wood are “common” resources, they are needed in larger amounts, and their mines/mills produce 2 of them each, per day.
Screenshot_22.png
Fuck.

This is week of disease, it wipes out all but a third of dwelling populations, this includes neutral, unclaimed ones, for the week. This is gonna make gathering an army suck a good deal more. I’d reload, but this mission is easy as hell, thankfully.

We also get the pixies to join us, and can flag the ore pit unopposed, it will produce 2 ore per day for us, as long as another player doesn’t flag it.
Screenshot_23.png
Back in town, I build the town hall now that we are at town level 3, to increase our income per turn to 1000. Town hall and similar economic upgrades tend to be high priorities.

At the end of this turn, we get a very brief cutscene (9:41-9:53)

So, is Isabel off to do some diplomacy over in Ashwood? Well… no, she’s going to slaughter the populace. What a Queen!
Screenshot_25.png
I would build the archer tower to start stockpiling more archers, but it requires ore, which I still don’t have enough of yet as we only just flagged the ore pit. So, I build the Farms instead, where we can produce delicious milk and kiwis, increasing peasant growth by 5 per week.
Screenshot_26.png
We ride back in the direction of the initial peasant hut we flagged to start getting more units and cleaning the map up.
Screenshot_27.png
Our army as we ride out, looking pretty solid for now, although we’ll need to bolster our forces a bit to clear the map.
Screenshot_28.png
Finally, back in Strongbow, we can build the archer tower.
Screenshot_29.png
Isabel keeps clearing the map and levels up again. War Machines are garbage for campaigns (they’re great in random maps for clearing early, but in campaigns, that’s not really something you’re going to need to have the extra supplement for), and the two “Master of” effects on the right are buffs to Light magic spells, so I spring for Expert Leadership.
Screenshot_30.png
I flag the lumber mill and then head down to clear the stack of zombies, so we can head back to Strongbow and grab our archers there.
Screenshot_31.png
After we grab our archers, we complete the objective to accumulate 100 archers, which levels Isabel up to 7. This one is kinda crap again, Defense is okay, but I’d rather have my two remaining skill slots go to Dark Magic and Attack, Advanced Light Magic is dead until the 4th map, as is Master of Wrath. And while recruitment is weak, it will at least provide tangible benefits on the next map.
Screenshot_32.png
We leave Strongbow for the final time (there’s plenty of dwellings and joiners on the map to supplement our forces), and head east this time, clearing out some pixies as we go.
Screenshot_33.png
Beyond the pixies is a Marletto Tower, our first stat booster. There’s one of these for each of the primary stats, and I’ll be making a case to visit them as much as possible, as their boosts are permanent and carry over into future scenarios.
Screenshot_34.png
We continue to clear weaker neutral stacks (yet more skeleton archers making me take unneeded casualties, I mainly sacrifice pixies as we can’t reinforce them on this map).
Screenshot_35.png
And level up again. Another crap one, Expert Trainer is more useful than Estates, as you’ll see on the next map, but I am still hoping for dark magic, or retaliation strike.
Screenshot_36.png
South of the skeletons is a Crystal of Revelation, which gives us permanent knowledge. I grab it.
Screenshot_37.png
We head east and encounter… scouts. They’re one of the strongest level 1 units, and there’s a horde of them. Nothing they guard is crucial…
Screenshot_38.png
But I take the fight and autocombat loses nothing but pixies, so I take the result.
Screenshot_39.png
ANOTHER dud level. Logistics would normally be a great pick, but it’s not needed for anything we’re going to be using Isabel in, most of her maps have little to no enemy pressure, and even the ones where we are under pressure will be on smaller maps. Master of Wrath is the best one here for me (Mass haste is great, and Mass righteous might is as well), but I’d really rather get dark magic.
Screenshot_40.png
Overall, though, our Isabel isn’t bad, I just wish we got offered Attack and Dark Magic already.
Screenshot_41.png
Isabel comes across a Mercenary camp, this raises attack by +1, a want for any hero.
Screenshot_42.png
We double back after flagging the mercenary camp to grab troops from the footmen dwelling and the peasant huts.
Screenshot_43.png
After slaughtering a few more neutrals we get… a slightly less bad levelup. Destructive magic sucks for knights due to their poor spellpower, but Advanced Counterstrike is okay, so we can keep unlocking knight skills. Estates is still poor for reasons given.
Screenshot_44.png
We cross the midmap river, and check out a redwood observatory again. This one is scripted to reveal Ashwood’s location (you can see it as the white castle picture on the minimap, ^ symbols are mines, flags are heroes, and boxes are creature dwellings), which is convenient. We still have some stat boosts to sweep up before I head north though.
Screenshot_45.png
I missed some stuff on the south side of the map though, so I go to clean up what’s left. Blood furies are functionally just harpies from 3 and 4, without the flying capabilities.
Screenshot_46.png
I want to show this fight though, to show off some tactics involved in fighting while protecting shooters. The first thing I do is put my archers in a safe corner, while putting other units around them to protect them from direct attacks. The pixies are in front as they’re expendable and I can’t replace them in this map, the footmen are next, as they’re tank, while the peasants get the back next to the archers.
Screenshot_47.png
This demonstrates how Isabel is statting up so far, these blood furies are level 2 units with a decent amount of health, and she can still kill 3 in a strike.
Screenshot_49.png
And we manage to clear the fight without any important losses, against a really annoying unit to fight.
Screenshot_50.png
After clearing out the Blood Furies, we can reach this water wheel. They’re functionally similar to windmills, but give us guaranteed gold per week instead of a random resource.
Screenshot_51.png
The last things left on this side of the shore are some resources next to a stack of zombies, on the fright side of the screen, and some loose resources and dwellings we can grab troops from.
Screenshot_52.png
We level up again, and I grab Benediction. It’s not the best buff we can drop on our troops in battle, but it’s our only one for now, and sometimes it will be the best choice over just attacking a unit.
Screenshot_53.png
The loose resources aren’t really needed anymore, as we can’t build anything in Strongbow, and the map will end when we take Ashwood. But I grab them anyway, why not? Also, note the week, we get another “event week”, in this case, all creatures get a HP buff.
Screenshot_54.png
Ah, forgot this stack of Blood Maidens. They’re just non-upgraded Blood Furies, who don’t have the “no enemy retaliation” ability.
Screenshot_55.png
After clearing them out, we head back north to check out the upper half of the map.
Screenshot_56.png
After grabbing the footmen, I decide to take on these blade dancers to grab the artifact they guard (which grants us +2 attack).
Screenshot_57.png
Another event week. It doesn’t do much of anything as the only units of this faction on this map will be weaker neutral stacks.
Screenshot_58.png
Benediction briefly shown off in battle, it’s under our spellbook and takes Isabel’s turn to cast. It’s a decent enough buff, anything that improves initiative is strong, but we’ll get stronger buff spell later via light magic. A downside to it is that is that it doesn’t scale apart from small duration increases for every level Isabel gets.
Screenshot_59.png
We flag the ore pit in the corner behind the blade dancers. Yet again, no point for it, I just wanted to.
Screenshot_60.png
I head back west and grab another Mercenary camp, then run into some minotaurs. They’re higher level units than most of what we’ve run into so far…
Screenshot_61.png
But we have a strong enough army to BULLdoze them without much trouble. And finally, a good level! We get basic attack (increases damage dealt by creatures in melee by 5%, but the skills attached to it are excellent), and reach the level cap for this scenario.
Screenshot_62.png
We grab some more peasants, my main goal now is to just check for stat boosters, and then head back and take Ashwood.
Screenshot_63.png
Grim raiders, another new unit. They’re pretty tough. But we autocombat them with no losses, because our army has reached critical enough mass to squash most neutral stacks without losses unless they have shooters.
Screenshot_64.png
Nothing worth grabbing in this corner, don’t need the resources, and no stat boosters.
Screenshot_65.png
Another special week. Not one that will have much effect at this point, as the remaining stacks that can join us will do it automatically, and the others won’t join us period.
Screenshot_66.png
Oh, speaking of, here’s some griffins.
Screenshot_67.png
They offer to join us; they’ll be a nice supplement to our forces when we take Ashwood.
Screenshot_68.png
As you can see their stacks are pretty strong (compare them to our peasants from update 1, even with the major stat improvements Isabel has had over the course of this map), and they have two other big attributes. Unlimited retaliation means that they can retaliate in melee an unlimited amount of times, making them great for getting in a melee scrap with other units. They also are fliers, meaning they can fly over obstacles on the battlefield, including town walls.
Screenshot_69.png
Apart from a few peasant huts and the footman dwelling, there isn’t anything else of note by Ashwood proper, so we move in to take it.
Screenshot_70.png
Autocombat grants us a frankly insane win, if this was a typical battle, I’d take it in a heartbeat. But, I want to be fair and show how this fight would go, as well as show how sieges go.
Screenshot_71.png
In a siege, the defenders get benefits, based on how well upgraded the fortifications are. No fort leads to a field battle, this town has a Fort, which gives the defenders walls (which are treated as obstacles that reduce shooter damage, and block units from walking across (fliers can cross, at a movement penalty). Further upgrades add archer towers that shoot attacking units, and a moat that damages and stops movement of units that hit it. We, as the attackers, get our catapult, which shoots at the walls to try to open gaps and destroy towers. As you can see from the image, we got a gap on the first shot.
Screenshot_72.png
I have Isabel drop benediction on the first turn to buff up our units.
Screenshot_73.png
Spell animations! You’re going to see these a ton in the base game cutscenes, so get used to them.
Screenshot_74.png
We move our griffins forward, I want to get in close and block their archers from shooting, but striking the peasants first may be worthwhile.
Screenshot_75.png
Ouch, you can see how much shooting behind walls cuts our damage here, these guys should be killing FAR more than 22-44 archers here.
Screenshot_76.png
And the enemy conscripts get a bash. This stops the unit they hit from retaliating, which is a pain in the neck given that the entire reason I ran my griffins in was to chew up their squishy units.
Screenshot_77.png
I decide the pixies have served their purpose, and them in to deal some damage, and eat a strike that would otherwise hit our more powerful and valuable griffins.
Screenshot_78.png
You can see how crippled archers are when they’re in melee range, there are some ranged units that deal full damage in melee range, but a majority don’t.
Screenshot_79.png
With the archers shut down, I move my peasants and footmen forward.
Screenshot_80.png
Massed peasants hit pretty hard as long as you make sure they don’t get hit back, especially with Isabel’s attack stat.
Screenshot_81.png
And we win with much heavier losses than the autocombat gave us. I may have been able to preserve more griffins, but I have no clue how I could have played without losing anything but sprites, as their archers get to deal full damage from behind the walls, while ours hit like marshmallows by comparison.
Screenshot_82.png
And we win again! You can see how beefed up Isabel’s stats are compared to the end of the first maps. I’m not happy with how many defense levels I’ve gotten, as it’s the stat I care the least about other than spellpower with Isabel, but we’ll have more stat boosts and levels ahead.

The outro (9:57-10:12) is pretty brief, they give us a quick reference to Crag Hack... despite him not being in this game, and Stronghold not being in the base game.

God, I pity anyone who likes Sandro, it's gonna get much worse.

Screenshot_83.png

And now to choose some new starting bonuses for the third scenario. Frankly, I’d be fine with either the archers or the ore. I took the archers on my previous attempted playing of this map, and while they do make the early game easier, this map has NO ore mines, and Haven needs lots of ore to build. The ore can alleviate the pain a bit. The footmen are a non-factor, they’re alright meatshields, but I’d rather take the shooters who can attack without risking losses, or the ore to help us build up.

So vote, Archers, Footmen, or Ore!
 
>And now you remember the unpatched version of the game and the 3rd map of the Devil campaign where the druids would start spamming the map with Elven units that Elven heroes would gather and show up at your door with legions of stacks to face your hero, 25 imps, and harsh words.
 
Pretty sure I didn't even finish the first campaign. Just played regular games against the AI. Judging from all the stuff I've on the Internet, this game was somewhat busted, which never bothered me when I played it upon release. Good luck sir with your plan to finish all campaigns.
 
>And now you remember the unpatched version of the game and the 3rd map of the Devil campaign where the druids would start spamming the map with Elven units that Elven heroes would gather and show up at your door with legions of stacks to face your hero, 25 imps, and harsh words.
Yeah, that's the first mission I'd say is actually outright hard, I have beaten it before though, and with patches and a strategy it's not too bad.
Pretty sure I didn't even finish the first campaign. Just played regular games against the AI. Judging from all the stuff I've on the Internet, this game was somewhat busted, which never bothered me when I played it upon release. Good luck sir with your plan to finish all campaigns.
The campaign is... functional now, although it has a really weird difficulty curve (First campaign is super easy, last scenario is a lot harder but still easy, second campaign suddenly gets a lot rougher with little warning).

Also, remember, all to vote!
 
A bit of a tangent, but this game defined the possible number of creatures given a grouping word.

Few? 1 until 4
Several? 5 until 9
Pack? 10 until 19
Lots? 20 until 49
A horde? 50 until 99
A throng? 100 until 249
A swarm? 250 until... I forget

If anyone tries to describe a group of things and use the wrong word, I get cross.

Also, I vote Footman. Surely your defense-buffed hero would make them even tankier than before!
 
I've been interested in HoMM-style games for a long time, even though I'm terrible at them; I've touched 3 and 4, but never looked at 5 beyond Sseth's review of it. This should prove to be interesting, and for what it's worth I like how you're breaking some of your decisions down for those in the audience who might not be Slavic and know the correct build order and skill choices right out of the fucking womb.

Regarding Isabel's beatdown of her peasantry so far: those chucklefucks from the first map pretty much told their sovereign to fuck herself. She might be a crazy bitch, but I'm not sure what the hell else those guys were expecting to happen. Running roughshod over Strongbow seems pretty fucking stupid, but she's already got a notable amount of serfs taking up arms against her, and a less retarded story would show that this has been a building issue even before the war and at least try to explain why she's looking to purge first and ask questions if she feels like it. Or this might be a lead-in that she is, in fact, a crazy bitch who will only get worse as things go.
My gut instinct says archers for the next map, as they will be useful from the start.
 
Seems like a game that could work on a tablet, is there a mobile version of Hero's worth playing?
 
A bit of a tangent, but this game defined the possible number of creatures given a grouping word.

Few? 1 until 4
Several? 5 until 9
Pack? 10 until 19
Lots? 20 until 49
A horde? 50 until 99
A throng? 100 until 249
A swarm? 250 until... I forget

If anyone tries to describe a group of things and use the wrong word, I get cross.

Also, I vote Footman. Surely your defense-buffed hero would make them even tankier than before!
I'll be sure to include proper nomenclature for stacks.

I think the flow after swarm goes
Zounds: 500-999
Legion: >1000

The footmen aren't worthless, no starting bonus is usually (unless it's something like a spell you already have), but they're my least fave.
I've been interested in HoMM-style games for a long time, even though I'm terrible at them; I've touched 3 and 4, but never looked at 5 beyond Sseth's review of it. This should prove to be interesting, and for what it's worth I like how you're breaking some of your decisions down for those in the audience who might not be Slavic and know the correct build order and skill choices right out of the fucking womb.

Regarding Isabel's beatdown of her peasantry so far: those chucklefucks from the first map pretty much told their sovereign to fuck herself. She might be a crazy bitch, but I'm not sure what the hell else those guys were expecting to happen. Running roughshod over Strongbow seems pretty fucking stupid, but she's already got a notable amount of serfs taking up arms against her, and a less retarded story would show that this has been a building issue even before the war and at least try to explain why she's looking to purge first and ask questions if she feels like it. Or this might be a lead-in that she is, in fact, a crazy bitch who will only get worse as things go.
My gut instinct says archers for the next map, as they will be useful from the start.
Yeah, I wanted to make my build choices clear, as the skill system is kind of arcane from the outside looking in (just wait until we reach the future campaigns and I starting building for ultimate skills), and I don't want people getting lost. Plus, with how dry and easy most of the Haven campaign is, there's not a ton else to talk about barring new features, or neutral fights.

I won't spoil the story, but I will just tell you that my attitude towards Isabel is influenced by what's coming later. The plot really does just dump us into the Empire going from seemingly fine to suddenly full of rebels for what seems like no reason behind "I ain't fighting no succubus!"

Archers are always a good pickup, really, any time you're offered shooters, they're a fairly dependable pick.
Seems like a game that could work on a tablet, is there a mobile version of Hero's worth playing?
Well, your options are a bit limited.

There are some official Might and Magic phone games, but it's all gacha casino stuff that doesn't play like a proper Heroes game, would not reccomend.

There is a cool fan project called Free Heroes that makes Heroes 2 playable on mobile (although it's not finished yet, and the campaigns aren't accessible). 2 isn't the best installment, but if you have an Android device and can import the assets via SD card, it's the closest official thing to a mobile release of any of the mainline games. Check it out if you're really into the idea of playing the game on the shitter.


To all, this is gonna be my last post until the next update, we tied 1:1 for Footmen and Archers, so I'm tiebreaking and picking Archers.

The next two maps are easily some of the game's dullest for reasons you'll see soon, I may heavily abridge large portions of them to avoid monotonously writing "and then I killed this neutral stack, and that neutral stack".
 
Well, that agony is finally done. Probably could have abridged even more than I did, just a tedious map to get through.

Prepare for the second most dull map of the game, at least as far as I’m aware. Opening cutscene (10:14-10:29).
Screenshot_1.png
Our goals here are to clear out the demon scouts (that being, all the neutral stacks of Inferno units on the map), and to building a Jousting Arena (Lets us recruit our tier 6 unit) and upgrade it. We have only one town, and no enemies on the map.
Screenshot_2.png
We start out with Ashwood, from last time, and I open by building peasant huts.
Screenshot_3.png
And recruiting the peasants
Screenshot_4.png
to bolster Isabel’s rather meager starting force. Thankfully this map has a ton of dwellings and joiners on it, because before long, you’ll see the one thing that makes this map extra aggravating.
Screenshot_5.png
I start by fanning out, there are three peasant huts, unguarded, near Ashwood, as well as a footman tower. Isabel visits them all to stock up more men.
Screenshot_6.png
Next turn, I build the Town hall for the income boost, money is important, and increasing your flow of it early on is usually a good idea.
Screenshot_7.png
One of the many stacks of Inferno troops we’ll need to clear is just east of Ashwood. Thankfully, imps are wimpy.
Screenshot_8.png
Ashwood builds archer towers next turn. This also consumes most of our starting ore… which is a problem, because this map has no ore mines. We’ll need to either find it on map, or use an alternative method to get more, which I’ll show later.
Screenshot_9.png
I run into a lumber mill (+2 lumber per day) just southeast of town, guarded by a horde of peasants.
Screenshot_10.png
Who eagerly offer their services.
Screenshot_11.png
Ashwood builds a new building, the tavern. It serves two functions.
Screenshot_12.png
And can be accessed via the tankard button on the left.
Screenshot_13.png
Its primary function is to let us recruit more heroes. While they won’t carry over to the next scenario, they can be useful for several other things, like picking up loose things to give our main hero more movement to spend on scouting or fighting, grabbing from onmap dwellings, or interacting with weekly buildings.
Screenshot_14.png
The thieves guild is also here, it ranks some stats among all the players. It’s cool, but not really major or necessary. It gets better the more taverns you own, or the more money you spend. This one does at least tell us there’s an enemy player… somewhere.
Screenshot_15.png
Back to business though, I hire Irina…
Screenshot_16.png
And strip her of most of her army. Her goal is to grab units from dwellings and pick up loose junk, Isabel will handle all the fighting.
Screenshot_17.png
The other main job of Irinia is going to be parking on this trading post. We will not be able to reach our upgraded jousting arena without ore, and trading is the best way to quickly get resources that you don’t have. We can also build a structure in town that serves the same function, but the trading post has better exchange rates than the marketplace in town (at least initially, the marketplace exchange rates are based on how many marketplaces you have built, so later, if we own multiple towns, the marketplace may beat the trading post in exchange rates).
Screenshot_18.png
After clearing the initial area around Ashwood, I send Isabel back to claim the army we’ve built up.
Screenshot_19.png
We build the blacksmith in Ashwood. I don’t intend to use it directly, but it unlocks the footman dwelling for later.
Screenshot_20.png
As you can see here. We’re also really feeling the ore shortage, we have several buildings we can’t build until we get the ore shortage sorted out, or take some time to get more wood.
Screenshot_21.png
We build the marketplace next turn. My intention here is mainly to get my town level up so we can get closer to the next Hall level.
Screenshot_22.png
Isabel rides out again, this fight against lots of hell hounds is tempting, as it blocks an archer tower, but Hellhounds are really fast and would probably fuck up our archers in a fight. I’ll come back to them later.
Screenshot_23.png
Building the farms just before the end of the week lets us send people infected Minecraft mod packs, and get an extra 5 peasants at the start of next week.
Screenshot_24.png
Isabel heads back out now, flagging several peasant huts and an archer tower.
Screenshot_25.png
Back in town, we don’t build anything. We could build the stables, but that would use the last of our ore for no immediate effect.
Screenshot_26.png
Meanwhile, Isabel gets a solid stack of joiner archers.
Screenshot_27.png
Diplomacy finally procs! These Blood maidens offer to join us for 4k gold. I reject them though, as that would interrupt my build plan for a bunch of okay at best Tier 2 units.
Screenshot_28.png
You can see here how much of an effect the flagged dwellings and farms have on our peasant growth, as it’s 10 above the base growth.
Screenshot_29.png
More joiners! I gladly take their aid.
Screenshot_30.png
And we build the city hall this turn too, upping our income even more. This is why I drove hard to get town level up.
Screenshot_31.png
We visit a mercenary camp, one of the two stat boosts on this map.
Screenshot_32.png
And now we loop back around to kill that stack of hell hounds from earlier.
Screenshot_33.png
This is the trade screen, which we can use to exchange resources for other resources. The other resources are mercury (the cauldron), crystal (red crystals), sulfur (yellow pile), and gems (blue pile), they are considered rare resources, their mines produce only 1 per turn, and they cost more in an exchange, but also exchange for more. In this case, we have a shitload of sulfur we won’t need to use.
Screenshot_34.png
So we use it to get some ore to build up our town a bit more.
Screenshot_35.png
This is the hero exchange screen, just wanted to show it while Irinia ships some troops to Isabel. Heroes can trade units and artifacts with each other freely, a certain ability tied to the Enlightenment skill allows you to teach other heroes spells as well.
Screenshot_36.png
We build the citadel next turn. The main effect is increasing creature growth by 50% in this town, the extra defenses are also nice, it makes touching the squares in front of our walls slow and damage enemies.
Screenshot_37.png
Isabel levels up while clearing the map. This one is actually good!
Screenshot_38.png
Retribution is our first complex ability. It’s based on being unlocked by another ability, in this case, expert trainer. Isabel has expert leadership, so dealing extra damage based on morale is a natural pick for her. I also wanted to clarify how abilities and skills work again. You get 1 ability in a skill for each level you have in a skill, up to 3. If you want complex abilities, it means knowing what unlocks what and skipping other options.
Screenshot_39.png
Also, new artifact. +2 defense is typical, although the 50% protection from fire spells is a new effect.
Screenshot_40.png
Another level, this one is crappier, but Advanced Attack is an okay pick to get more attack skills.
Screenshot_41.png
Back in town, I build the resource silo. Every town has a resource silo, but they each give different resources. The crystal will be needed for the jousting arena later, and we can use any excess to trade for more ore.
Screenshot_42.png
More joiners, marksmen in this case. These upgraded Archers have better stats, and a special ability that allows them to deal more damage at close range, although not in melee.
Screenshot_43.png
And praise be to the Lord, some ore!
Screenshot_44.png
However, as we’re still short on ore, I build the peasant cabins, which can be used to upgrade our peasants, and increases our town level.
Screenshot_45.png
Some resource trading by Irina gets us enough ore to build the Griffin Tower. Even if you don’t want to recruit units right away, it’s not a bad idea to build structures so the units can accumulate later (unless you get shit like week of disease like I did back in map 2).
Screenshot_46.png
We get the Capitol built next turn. You can only build one capitol per game, although it gives quite a nice pile of cash every day.
Screenshot_47.png
Cavaliers! These guys rock, and I have played this map enough to know by heart that they’re joiners.
Screenshot_48.png
Look at those stats, high initiative, high speed, tons of hp and damage, and plenty of attack and defense when buffed by Isabel. They also have an amazing ability that causes them to deal more damage per square they move before attacking. These guys are amazing and get even better when upgraded, they’ll be a big asset for the rest of this map.
Screenshot_49.png
A horde of cerberi seems like a fair test for our freshly recruited cavaliers.
Screenshot_50.png
Yeah, that damage is pretty nasty, helps that these guys are pretty meaty on top of it.
Screenshot_51.png
And minimal casualties are scored.
Screenshot_52.png
Another level, this one is decent, although I’m still banking on dark magic. Archery and Advanced luck are tempting, Tactics (increases the range of the tactics screen) is decent, but Archery is better for the same slot, and I already said why destructive magic is trash for knights.
Screenshot_53.png
I pick archery, as it’s a natural fit for my playstyle.
Screenshot_54.png
We get the stables built back in Ashwood, as they are a prereq to get the jousting arena.
Screenshot_55.png
And next turn, the jousting arena is built.
Screenshot_56.png
Some griffins join us, can always use some more units to beef Isabel up, as she’s still a pretty long trek from Ashwood.
Screenshot_57.png
Our next level is a bleh one, Advanced light magic is fine, but it’s not going to get much use until next map.
Screenshot_58.png
No matter, I get the castle built in Ashwood just before the end of the week. This upgrades the citadel’s defensive capabilities (stronger wall and arrow towers), and makes the growth 2x instead of 1.5x. This means a Castle equipped town is going to shit out units at a rather hefty rate.
Screenshot_59.png
Ah, our first Throng. Yeah it’s shitty imps, but it’s a start.
Screenshot_60.png
We also finally can get our Order of Paladins built up, fulfilling one of our required objectives from the start.
Screenshot_61.png
Which also gets us a level. Basic Enlightenment is really tempting, as it’s a big pile of stats with some decent abilities tied to it too… but it’s not the greatest fit for exactly what I’m looking for.
Screenshot_62.png
I decide on taking advanced Luck instead, as it will benefit Isabel more in my eyes.
Screenshot_63.png
With all our other dwellings done, I start trading more resources to get our remaining dwellings upgraded, so that we can upgrade our troops and recruit the upgraded versions of those troops. The Griffins and the Archers are the big ones to upgrade, but the footman upgrade is quite nice too.
Screenshot_64.png
I send Isabel around behind Ashwood to grab the sword of might to further buff her attack. It doesn’t carry over, but more attack is never a bad thing.
Screenshot_65.png
I now head to the previously unexplored northern hunk of the map, revealing a bunch of it with a redwood observatory. I’ll spend the next few turns clearing this area for levels and joiners.
Screenshot_66.png
Back in town, I upgrade the griffin bastion.
Screenshot_67.png
Isabel reaches her level cap of 18. No dark magic is a real shame, but apart from summoning magic, these are all solid options. Expert attack itself is mediocre, but the abilities attached to attack are excellent. Magic resistance is a percentage reduction of magic damage taken by our units, and Master of Abjuration buffs more light magic spells.
Screenshot_68.png
I decide expert attack will be the most important here.
Screenshot_69.png
This is a gem mine, I mainly showed it here so you can see the production difference between it and the sawmills/ore pits, 1 per day instead of 2.
Screenshot_70.png
And finally, the garrison, our last upgraded structure. The remaining one is the training grounds, which are not really needed for this scenario.
Screenshot_71.png
Another artifact, Sack of endless gold. Won’t grab it as we have tons of money already and only one major fight left.
Screenshot_72.png
So I send Isabel back towards Ashwood to grab troops and upgrade her army for the final confrontation.
Screenshot_73.png
I do flag this gold mine on the way though. Gold mines give 1000 gold per day, making them very important to flag, especially in later maps when we have more troops to buy.
Screenshot_74.png
This is the upgrade UI. We can pay a fee to upgrade unupgraded units to their upgraded form. The upgraded forms are more costly, but usually pack better stats or new abilities.
Screenshot_75.png
Our army after upgrades and purchases, quite a potent force, shame we won’t carry it over because scenario balance.
Screenshot_76.png
Isabel’s current build status too, dark magic isn’t looking too likely unless we get some massive luck next scenario.
Screenshot_77.png
Ah, how convenient, an event week that screws up Inferno unit stats. That surely won’t affect the final battle.
Screenshot_78.png
Some devils block the way to the only part of the map we have yet to explore, these are Tier 7 Inferno units. But with the power of our army, trashing them will be easy.

After defeating the last stack of inferno units on the map (it's intended to be the devils, but you can do it in any order), you get another cutscene (10:31-10:43)
Screenshot_80.png
I didn’t catch it, but an enemy hero spawned in between my two turns, and attacked us. His army is pretty good, but not overwhelming. Let’s fight him ourselves.
Screenshot_81.png
Well, time to show off one of the most busted specials in the game. Battle dive sends battle griffins into the air for a turn, then they come down and land a devastating hit on whatever is under them. The problem is that the AI is fucktarded, so you can clear neutrals with nothing but battle griffins if you’re careful and patient. I won’t be abusing it here, but if this was a Heroic playthrough, I absolutely would.
Screenshot_82.png
Liftoff!
Screenshot_83.png
Missed it during the battle, but the AI just used gating on its imps and horned overseers. This is an ability unique to inferno that I’ll explain in depth during their campaign. For now, just now that after a delay, a fraction of the stack worth of new units will be summoned on that spot, and then despawn after the battle/dying.
Screenshot_84.png
Look at that damage output, and that’s after the Paladins copped a fireball from the enemy pit lords.
Screenshot_85.png
And bad luck strikes due to the event week, this causes them to deal half damage, pretty nasty even though I had cut the stack already.
Screenshot_86.png
Even though our forces are arguably equal in count, Isabel has better stats, and frankly, Paladins are significantly better than Pit lords.
Screenshot_87.png
And before too long, the fight is over, with moderate casualties, giving us the closing cutscene (10:45-11:31). Gee, I wonder why Beatrice popped up in the midst of a hellish battle right next to a bunch of demons...
Screenshot_88.png
And we win again! Forgot to show Isabel’s stats, so I’ll do it at the start of the next update. This mission was very easy, just really tedious.

Screenshot_89.png

This mission is EVEN MORE tedious, and what’s worse is there are a ton of stat boosts on the map, so you basically have to cover the entire map to get Isabel boosted up. However, as far as start bonuses go, I’ve got a clear order of preference. The Cavalier has great stats, and even 1 can make a huge difference early on. The Marksmen are shooters, and while not as tough as the cav, are good by that merit. The Squires are, as already stated, too damn slow to be of much use, and we don’t even get that many of them this time. Make sure to vote either Cavalier, Squire, or Marksman!
 
>nearly 500 archers going into the last fight
I know those are probably pedestrian numbers, but holy shit that's a lot of pew pew going downrange.

Basic Enlightenment is really tempting, as it’s a big pile of stats with some decent abilities tied to it too… but it’s not the greatest fit for exactly what I’m looking for.
I'm surprised to see that they took the effort to make the EXP boosting skill worthwhile. A retroactive stat bonus is pretty damn nice, and I'm willing to guess it's a safe pick in most situations, especially when all your other options are kind of crap.

I also wanted to clarify how abilities and skills work again. You get 1 ability in a skill for each level you have in a skill, up to 3. If you want complex abilities, it means knowing what unlocks what and skipping other options.
Correct me if I'm wrong, but I have a vague memory of 4 having a similar skill unlock mechanic, but didn't have any in-game tooltips or lists that told you what opened up what. At least here, there's some kind of idea what to expect for new players or just as a reminder. That's pretty nice.

I'm going to pull for the Cavalier this time. I'm curious to see just how much heavy lifting one angry man with a pony and a pokey stick can do.
 
>nearly 500 archers going into the last fight
I know those are probably pedestrian numbers, but holy shit that's a lot of pew pew going downrange.


I'm surprised to see that they took the effort to make the EXP boosting skill worthwhile. A retroactive stat bonus is pretty damn nice, and I'm willing to guess it's a safe pick in most situations, especially when all your other options are kind of crap.


Correct me if I'm wrong, but I have a vague memory of 4 having a similar skill unlock mechanic, but didn't have any in-game tooltips or lists that told you what opened up what. At least here, there's some kind of idea what to expect for new players or just as a reminder. That's pretty nice.

I'm going to pull for the Cavalier this time. I'm curious to see just how much heavy lifting one angry man with a pony and a pokey stick can do.
500 is actually a pretty large stack even for later maps, it's mainly due to the lack of any taxing battles and huge amounts of onmap dwellings in these early maps. Later maps will force us to conserve troops more and be more careful with fewer troops.

Enlightenment is really nice, I have at least one hero I'm getting it on for sure, and a second I may throw it on if the game accomodates.

4's system is similar but pretty different in how it plays out. 4 has subskills attached to major skills, but each levels up independently, and there are no dependent skills outside of their own trees. This makes it a lot more forgiving and makes it harder for you to irrevocably fuck up a build because you picked the wrong skill, not even aware that you could screw up your build that way. 5 looks more welcoming until you need to build a certain path, then it stabs you in the back. It's not too bad if you use the skill wheel, or just look up the skills online, but as a kid, I couldn't build right for the life of me.
 
  • Informative
Reactions: Mooger Meng
I choose the Cavalier because he is epic.

Also, I like the soundtrack in this game, but I think IV's is more atmospheric:
 
  • Like
Reactions: Throng of Titans
Back