Custom slobbermutt emotes

  • 🐕 I am attempting to get the site runnning as fast as possible. If you are experiencing slow page load times, please report it.

Gaunt King Ithan Rilph

"Sargon is probably the tastiest person" - Josh
True & Honest Fan
kiwifarms.net
Joined
Apr 16, 2022
I've been making a bunch of these and will continue to make more. Feel free to contribute your own or make suggestions. I'm not an artist so it's mostly smaller edits, I'll attach any extra assets I make. I use GIMP for editing.

troonshined mutt.gif
HRT mutt blush.png
puppies mutt.gif
cool mutt.png
cool mutt.gif
chattering mutt 2f.gif
jittery mutt.gif
LGBT mutt.gif
loading mutt.gif
climbing walls mutt.gif
peakaboo mutt.gif
peakaboo sunglasses mutt.gif
chattering HRT mutt.gif
santa mutt.gif
snigger RIP mutt.gif
crying mutt.gif
seething mutt.gif
webdev mutt pizza.gif
pizza day mutt.gif
jewish mutt.png
silver coin mutt.gif
walking robotic mutt.gif
crowned mutt 7.gif
silver coin flip mutt.gif
broke pic mutt.gif
fedora mutt.png
failed loading mutt.gif


mutt hand.gif
santa mutt tank shooting corn.gif
moving and shooting santa tank mutt.gif
drowning mutt.gif
growing mutt.gif
Super HRT mutt.gif
birthing mutt.gif
birthing mutt extended.gif
snigger RIP mutt rehab ver.gif


:ramona:
Spoon poking.gif
HRT mutt blush flipped.png
Spoon poking hit.gif

santa mutt flipped.gif

To use them in sneedchat, add:
instruction 1.png

If you want to add text or further images in the same post, you have to close each link like so:
instruction 2.png


assets.png
 
Last edited:
Here's a very basic tutorial on gif editing in GIMP. It's a lot more simple than some might imagine. I'm making this hoping that people try something they otherwise would not have.

A gif is just a stack of image layers that gets flipped through:
showcasing gimp.gif


The animation starts at the bottom and loops back to the start once played out. To make it a smooth up and down motion, a second 'position 2' mutt is added at the end so that when it loops, it results in a sequence like this: 1-2-3-2-1-2-3-2-1 etc.

jittery mutt.gif


Exporting/Saving:
export as.png


When exporting, you must give the file a .gif extension, this will prompt the following window:
export as gif.png
  • Check 'As animation'.
  • Delay between frames is how long each layer is visible. 1000ms = 1 second. For smoother animations, 50-150ms is appropriate. This gif is the tutorial gif posted above, so it has a long delay for demonstrative purposes.
  • For gifs with transparent backgrounds, always use 'One frame per layer (replace)'.
  • You do not need to check 'Use delay/disposal for all frames'.

Delay
Sometimes you want to linger on a specific frame for a longer or shorter time than other frames, to do this, add the desired ms in parentheses into the layer name.
different delay.png

If you want all frames to have the same delay, no need add anything to the layer names. Instead choose the delay when exporting (explained above). If you have 10 layers and 8 of them should be 50ms, 1 should be 100ms and the last 150ms, you only need to manually set 100ms and 150ms. Then select "50 milliseconds" when exporting (showed above). Do not select "Use delay entered above for all frames", as it will overwrite the manual edits.

Tools
'Image > Crop to content' is your friend. Use it to get rid of empty space.
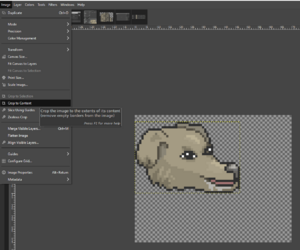
crop to content.png

'View > Snap to grid/canvas edges' can be helpful for aligning assets.
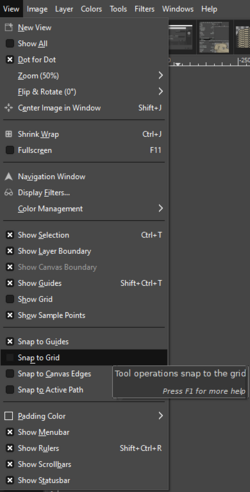
snap to.png

Adjusting multiple layers/linking
Shift click the space marked in red to link/unlink all layers, now you can move or adjust all of them with a single action.
linking layers.gif


Assets
A search engine that lets you select only transparant images is great, I use duckduckgo but there might be better ones. Add "pixel" as a search term for whatever you want, if you get a lot of relevant results, you may want to limit the size to "small", as they are easier to scale.
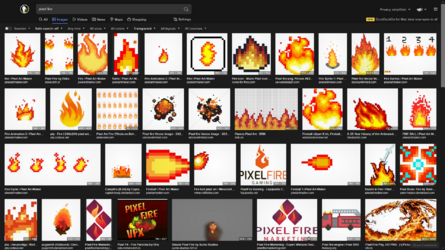
pixel fire search.png

Editing assets
You can safely flip layers vertically/horizontally without displacing pixels (seen above), but scaling down or rotating will cause minor-major defects. Because of this, you should select "Interpolation: None"
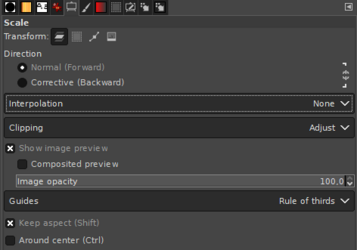
interpolation.png

Here I scaled down a large Kiwi Farms logo to 25x25 pixels. The left uses LoHalo Interpolation, the right uses None. As you can see, the right is much easier to touch up with the pencil tool.
*Note: 1600% zoom:
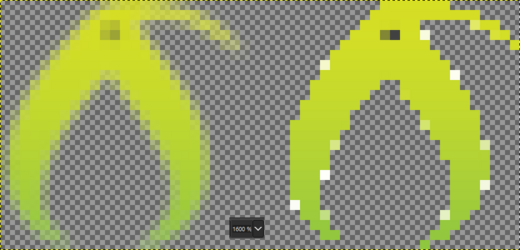
zoomed in on small assets.png

Drawing skewed pixel art can be very hard, starting with a symmetrical shape, rotating and then touching up may be faster.
Here I found a hammer on the internet. But it was using too thick outlines. First I rotated it to a standing position, did some basic edits with the pencil, rotated it again and touched up the rotated version as well. Now I have both a vertical and skewed hammer. After that I used "Color > Color Balance..." to make it look better.
*Note: 550% zoom:
hammers 550% zoom.png
 
Last edited:
Back