- Joined
- Dec 8, 2019
The God Eater Collab and Part 2 of the DLC is now in session. Let me preface this by saying the expansion is just more of the same - still filled with the same mobs, still following the same Depth map format (2 minibosses, 1 main), and still giving out reskins of pre-existing weapons and cloaks as rewards. At this rate, I don't see why Part 3 is going to change anything. If you didn't have the season pass, you're better off holding onto that 10 bucks unless you think seeing Mia in a new getup is really worth that much. At least this time though, I thought the new level felt like an actual map and not just a bunch of pathways. Maybe I'm just too easily impressed by snow.
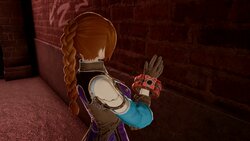
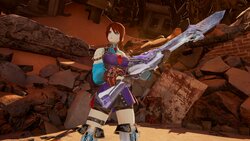
On the bright side, the free part of the update adds the option to make your Blood Veil invisible during regular gameplay, as well as letting you lose the gas mask during photo mode. There's also a whole bunch of new frames to pick from, a few imitating different HUDs from the God Eater games. Would have been neat to make them fully functional, but that would require some crazy overhaul of the system.
So anyway, about the new boss:
It is apparently a Marduk Aragami, but the new design is so out there that even God Eater fans were confused when the leaked data labeled it as such. Just goes to show the power of wearing a face mask to bed and applying a bit of lipstick. Another departure from its origins is a newfound focus on spell-casting. That's right, it's another mage boss! Unlike Inverted Backside though, this one strikes an equal balance between magic and melee. It's also not as heavily armored as the first DLC boss, so you aren't constantly forcing yourself directly into a danger zone just so your attacks can hopefully reach its head. My first time defeating it didn't take nearly as long as a result. However, the first DLC boss also had a visually impressive yet understandable moveset - this one by contrast is relatively static but filled with AoE annoyances. The key to it all seems to be the two ice crystals constantly orbiting the creature.

You can't lock onto them (they rotate so fast the camera would have reached for the barf bag anyway), but these things will make the boss increasingly tough if left alone. Sometimes they boost defense, other times they grant a damage buff, later on they create points of area denial, and at max tension the boss triggers its Instant Kill by sweeping the arena with giant lasers from multiple directions. The formation below indicates you are fucked beyond hope.
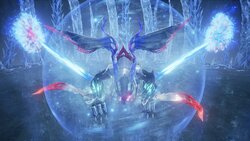
So in addition to stamina management, ichor management, and DPS openings, you have to whack those crystals on a regular basis... without a lock-on function. Ouef. This is where those new fire spells from Part 1 come into play; their lingering effects saves you the trouble of potentially missing your target. They also melt that health bar something fierce, so mage builds will find themselves right at home with this fight. Dedicated melee fighters... eh, good luck. Incidentally, the new Ymir class is incredibly friendly towards those who are going for pure spell-casting.
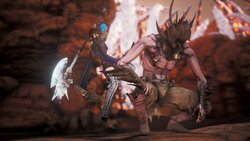
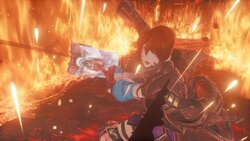
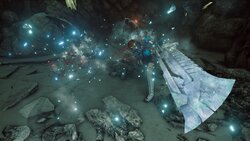
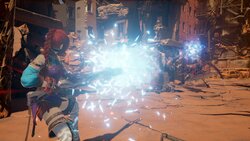
These new weapons are not nearly as experimental in stat distribution as the previous batch. The halberd, hammer, and greatsword are all STR-based, perfectly understandable. The biggest difference between them and their original versions is that these are lighter in weight at the cost of a slightly lower damage output. Heavy weapons guys can finally stop fatrolling for once! As for the new gun... I'm trying to make it work. The charged attack is an extended burst-fire shot that can hit from a mile away, but everything else about it cannot possibly replace either Brodiaea or Libertador. Even if it's as lightweight as the former, the lack of oomph is killing it.
And finally, let's see what new makeovers the DLC has given to Yakumo and Mia:
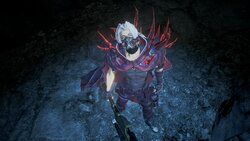

Dark Yakumo looks surprisingly normal. Boring even. Maybe it's the Sephiroth hair. Mia on the other hand doesn't look half-bad even with all the spikes.
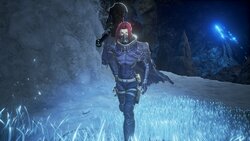
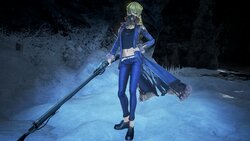
I thought the alternate skins would follow the formal trend implied by Louis and Io, but Yakumo's mercenary getup threw me in for a loop. He looks damn skinny in it for some reason, I don't know how. As for Mia, she looks fantastic. The surprisingly casual number more than makes up for the loss of her silly hat.
That's the end of Part 2. As mentioned before, the next one should be coming at the end of March, and will likely follow the same template. I wonder what's the plan after the Abyss DLC is finished...
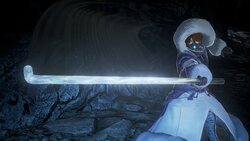
One more to go...
Last edited:


